To use the upload image option in Cogran, please connect your Cogran account to Cloudinary. Then, the system will work via API.
First, configure Cloudinary. Then, add your Cloudname to your Cogran!
Cloudinary Name
Step 1:
Sign into www.cloudinary.com

From the Top Toolbar, right click on the Settings image (gear/cog)

Select the Upload tab.

- Scroll down to Upload Presets
- Click “Add upload preset”

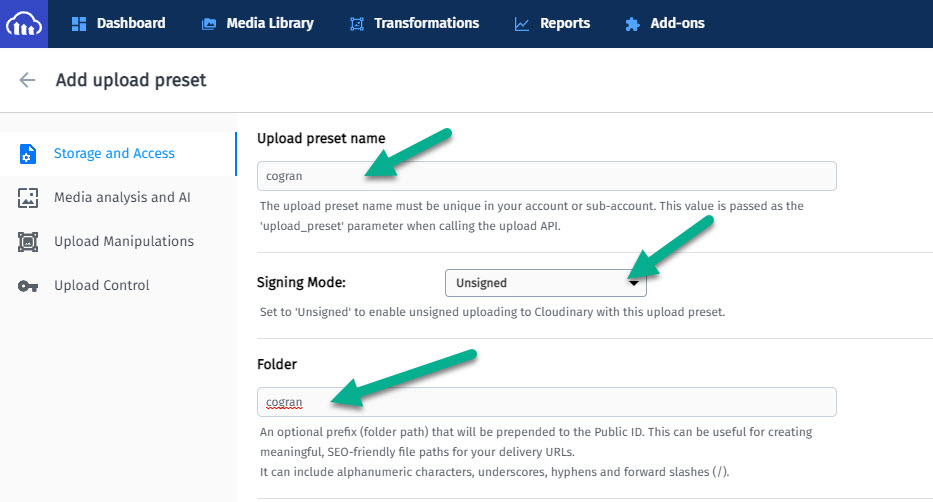
- A new form opens
- Enter for Upload preset name: cogran (if a default has appeared, overwrite this)
- For Signing Mode: select unsigned
- For Folder: enter cogran
- Save
- The window closes.
- On the visible page, navigate to Upload Presets if needed
- Click Edit.
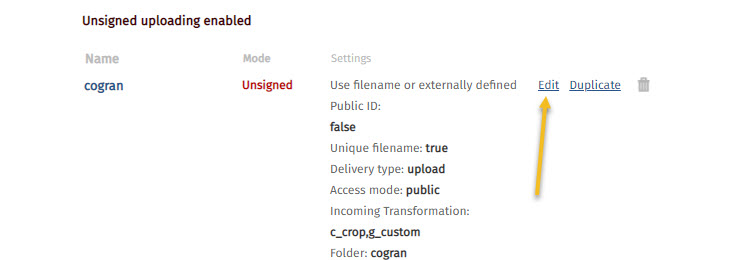

- A modal opens
- At Incoming Transformations, click Edit
- When dialog displays, click Mode = Crop
- Then select Gravity = Custom
- Click OK at the bottom right of the dialog
- SAVE – top right of form
Step 2: Find Your Cloudname
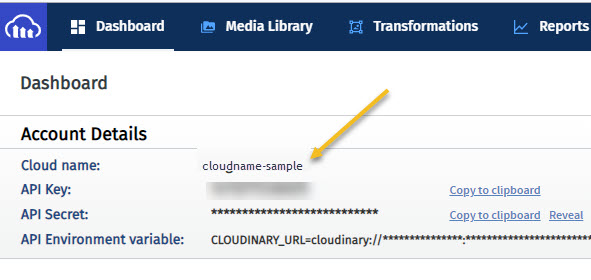
Click the cog for settings
- Click Dashboard from the secondary top menu
- View Account Details
- See your Cloudname
- Copy the cloudname and paste it in a text editor. You will need this later to setup Cogran System Preferences.
Step 2: Add to your Cogran System
- Log into the Cogran Back Office
- Scroll to Side Menu option: System Preferences and Access Control
- Choose Organization Details and Global Settings
- Search
- Use the “go to” menu to visit the Configuration File
- Click edit
- Enter the Cloudinary Name in the field Cloudinary Preset Name
- Save

Done!
Updated 9/7/21