Facility Setup by Block of Time
Block of Time is used to describe reservations that are for a predetermined length of time that begins at a time of a customer’s choice. Blocks of Time are a handy way to ensure that reservations are for a predetermined length of time, but with the flexibility of variable start times. A facility may have different blocks of time.
Instructions
Create Facility:
- Facility Setup and Management>Facility Setup
- Search>”Create new”
- Create the facility:
- Name the facility
- Attach the facility to a card. Be sure that this is a Facility card.
- Select a Preview Image
- Select a Calendar Color
- Enter text to appear on the email confirmation. This can be unique to each facility, but will be the same for each timeslot.
- Enter an Account/GL code if using
- Tax: Select a tax rate
- Choose a security role restriction: use only if required by this installation
- Choose if this facility is admin only
- Archive: Used when facilities are no longer being reserved.
- Clone: If making many similar facilities, use this option to clone the facility. Tip: create the timeslots first, then return to this option to use the clone features. Then, timeslots are also copied!
- The saved facility now appears in the list.
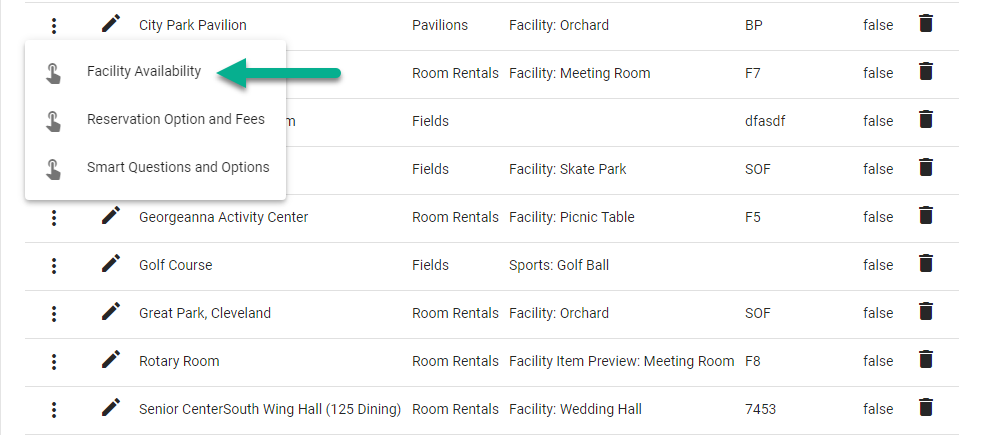
- Click the Go-To menu to access the next steps:
- Facility Availability
- Timeslots
- Smart Questions and Options
Availability
The availability sets certain information about the facility, which will apply to the timeslots. This also provides information that will appear on your Cogran site.
Tab One: Facility Display
Click the pencil to edit.
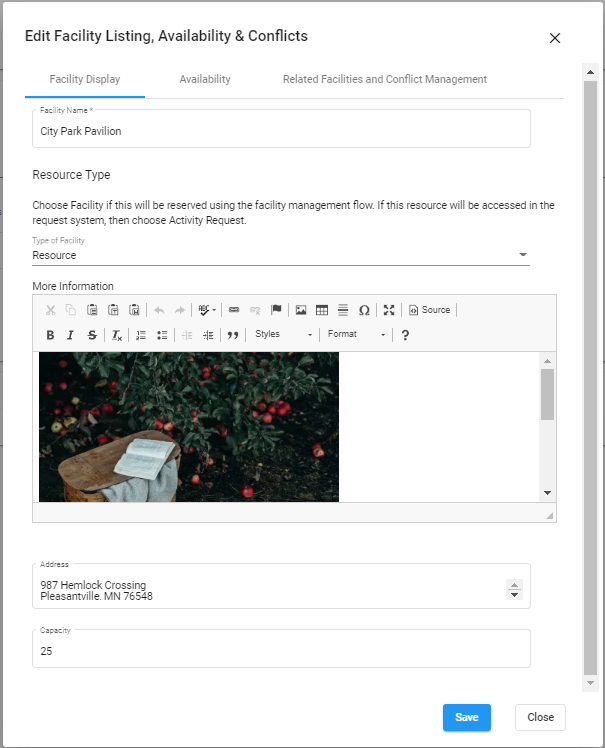
- Type of resource: Choose Resource
- Facility name: Enter the name that will display on the public listing
- More Information: Enter more info for the popup on the program listing. This can include images, text, lists, and more.
- Address: This address will appear on the public listing
- Capacity: This will appear on the public list
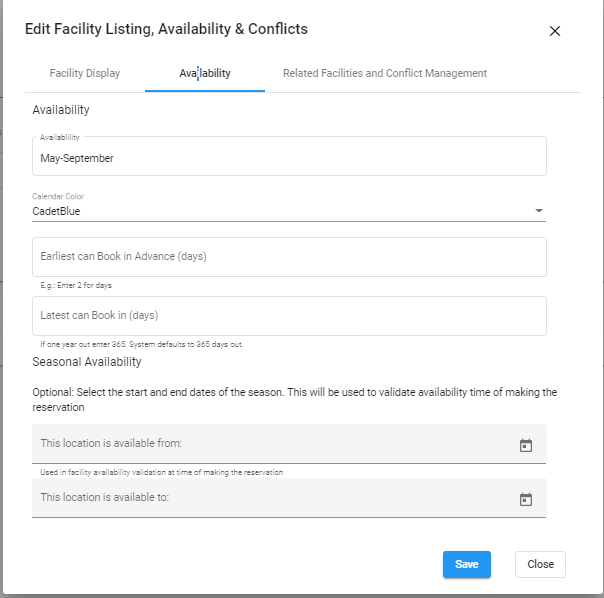
Tab Two: Availability
Use these fields to set overall availability. Important: This will override and supplement the details of all of the time slots. This is used when resources are seasonal.
- Describe when this resource is available: This text is used to describe when a facility is available on the public site. Examples include: Open between June and August, Open all year round, etc.
- Calendar color: Choose a color
- Earliest can book in advance (in days): use to restrict days in advance that a facility is available for reservation. This can prevent people from booking years in advance! Dates are rolling.
- Latest can book in advance (in days): use to close a location from reservations. This can prevent same-day reservations. Dates are rolling.
- Seasonal Availability: Select the start and end dates of the season. This will be used to validate availability time of making the reservation. These dates allow reservations to occur between set days of the year.
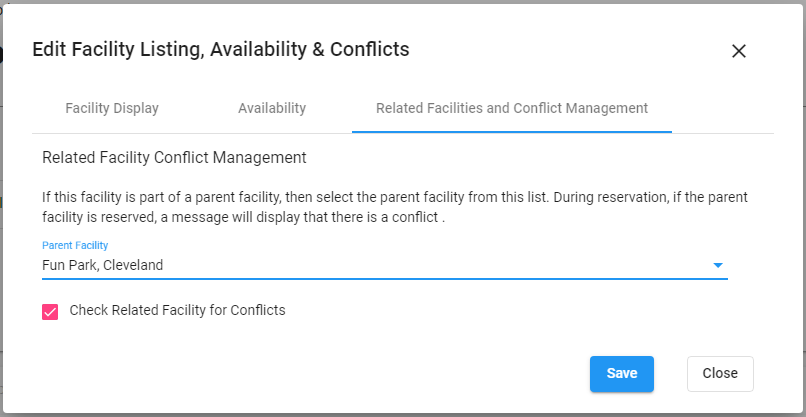
Tab 3: Related Facilities and Conflict Management
This is used to manage parent and related facilities. When a resource is part of a larger facility, this is useful to manage parent-child style relationships. This means that if part of this facility is booked, the remainder cannot be booked.
- Check related facilities for conflicts
- Select the related facility
Reservation Option and Fees
Each facility can have many time slots. Choose Reservation Options and Fees.
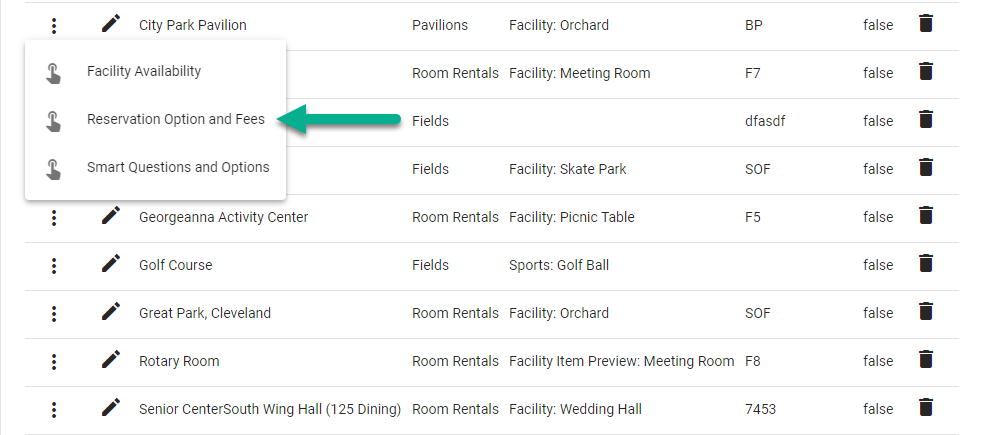
Click Reservation Option Setup
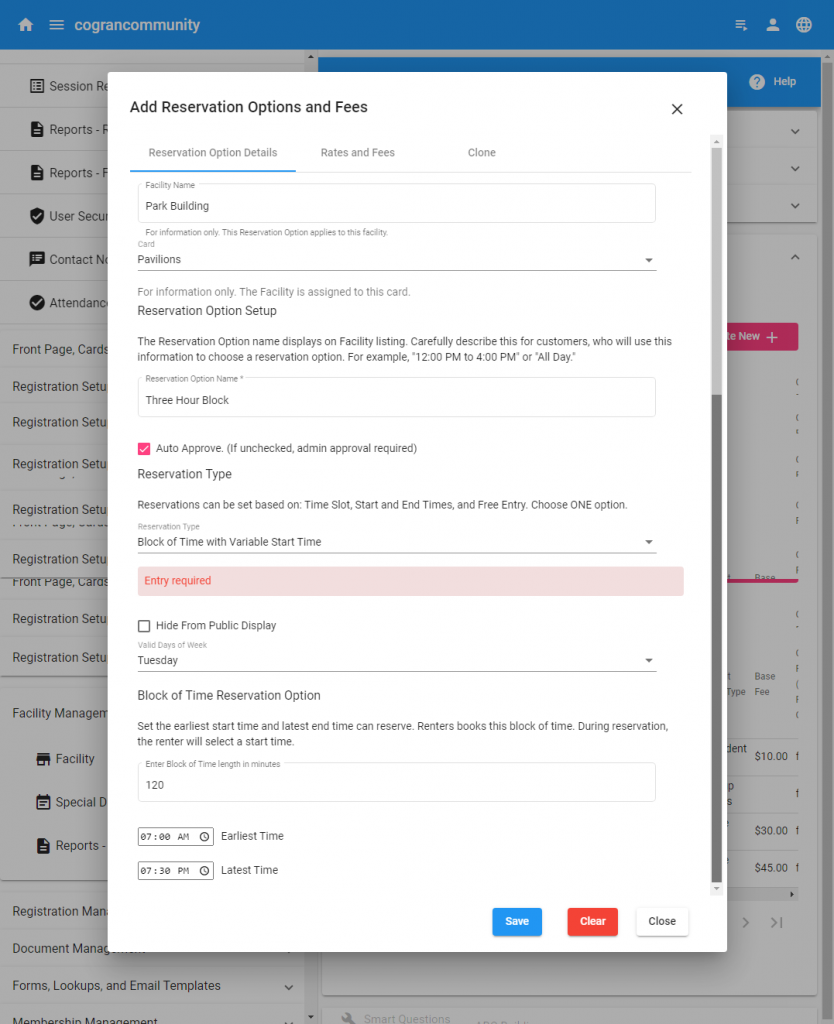
A form populates
Reservation Option Setup:
- Reservation Option Setup: The Reservation Option name displays on Facility listing. Carefully describe this for customers, who will use this information to choose a reservation option. For example, “12:00 PM to 4:00 PM” or “All Day.”
- Admin approval status: Leave unchecked if admins approve reservations. If checked, the reservation status will set to Approved upon reservation.]
- Facility Name: this is the facility to which the timeslot will appear. Read-only.
- Card: this is the card on which this facility displays. Read-only.
- Reservation Type: Choose Block of Time with Variable Start Time
- Valid Days of Week: choose days from the list. Multiple days may be selected. This option allows you to create different timeslots for weekdays and weekends, for example.
- Start Time and End Time: These times create the earliest and latest available times that this timeslot can be chosen.
Prices:
This section of setup is designed to allow pricing to be assigned to the timeslot.
- Choose a fee type:
- Hourly Rate: Pay a fee for each reserved hour of the block of time
- Fee Per Participant: Pay per the number of participants. This automatically will collect the quantity of attendees and extend the price by participants.
- Fee for Time Slot: Pay a flat fee for the Time Slot
- Choose rate types. Multiple rates can be selected. If not chosen, the rates will not apply.
- Base
- Group
- Member
- Resident
- Base Fee: Set the base rate
- Optional Pricing for Residents, Members and Groups:
- Check to validate pricing on zip code: enter zip codes under Forms, Templates, and Email Templates if needed
- Resident and Member Fees: If residency is approved, resident rates apply. Member rates require current member rates.
- Group Rates: Create Group Rates. The fees set here will apply if users choose a rate group during the reservation process. This price will override any other prices, such as resident, so set them up to accommodate this.
- Group Rate dropdown: this contains the currently assigned rate groups. Note: to set up the rate groups list, update the lookup named: GroupRate in the section Forms, Templates, and Email Templates if needed. Delete any not used, so that they do not display in the dropdown during the reservation process. Be sure to set the code as 1 – 5 to sync with the rate groups set here.
- Enter Group Rate 1
- Enter Group Rate 2
- Enter Group Rate 3
- Enter Group Rate 4
- Enter Group Rate 5
- Special Date Calendar
- To increase the fee by this percent on the certain dates, add a percentage between 1 and 100.
- Note: Be sure to set the Special Dates in the Reservation Setup menu.
Search>Create New>Fill out the form. These are the dates that will have special pricing. - For group rates, create one Calendar entry for each date and rate.
- If this special date applies only to all facilities, then leave the “Facility” field blank. If special dates are different for different facilities, fill in the name of the facilty here.
- Do not update these, but add new ones as the old dates expire.