How to Make a Reservation as an Admin
Cogran offers the ability for admins to make reservations for customers, for internal events, and for recurring reservations such as sports league reservations.
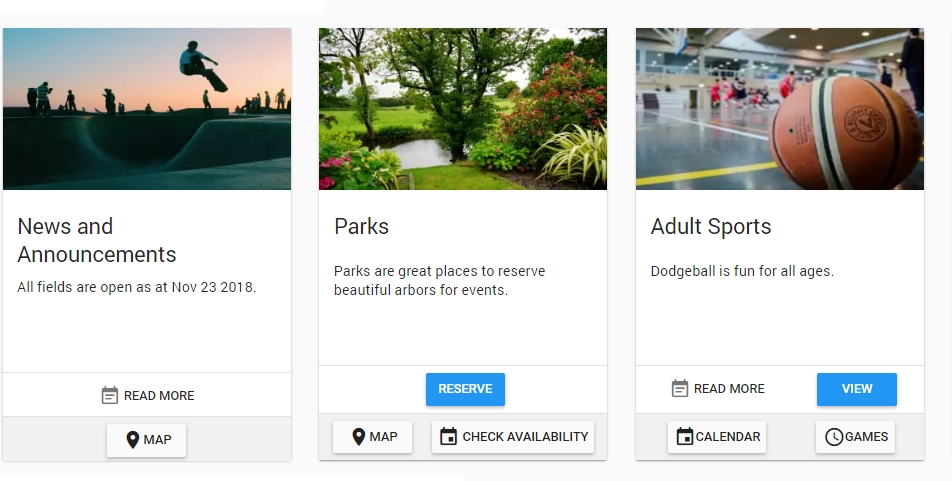
To find a potential reservation opportunity, visit the cards on the Front Page. Click “Reserve” to view a list of facilities. Click “Availability” to view a list of facilities by calendar.
Narrow down your options by using the month, day, and week options on the calendar. Then, click on your chosen date.
A modal opens. Fill out the modal. Note that existing reservations will appear on the page.
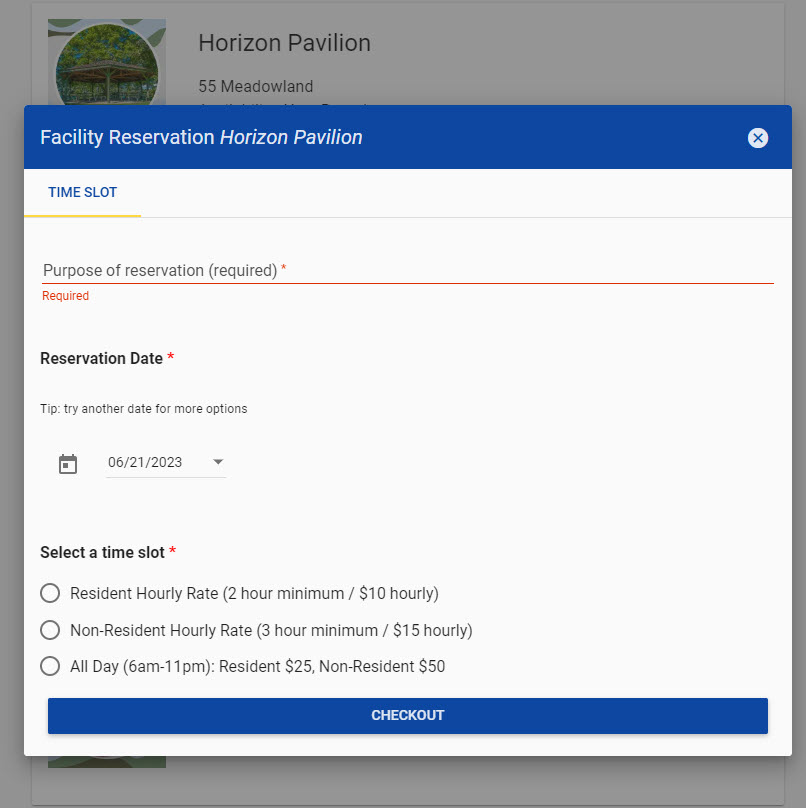
WHEN USED: Creating recurring meetings, creating sports leagues reservations, setting up annual events. Available only to admins.
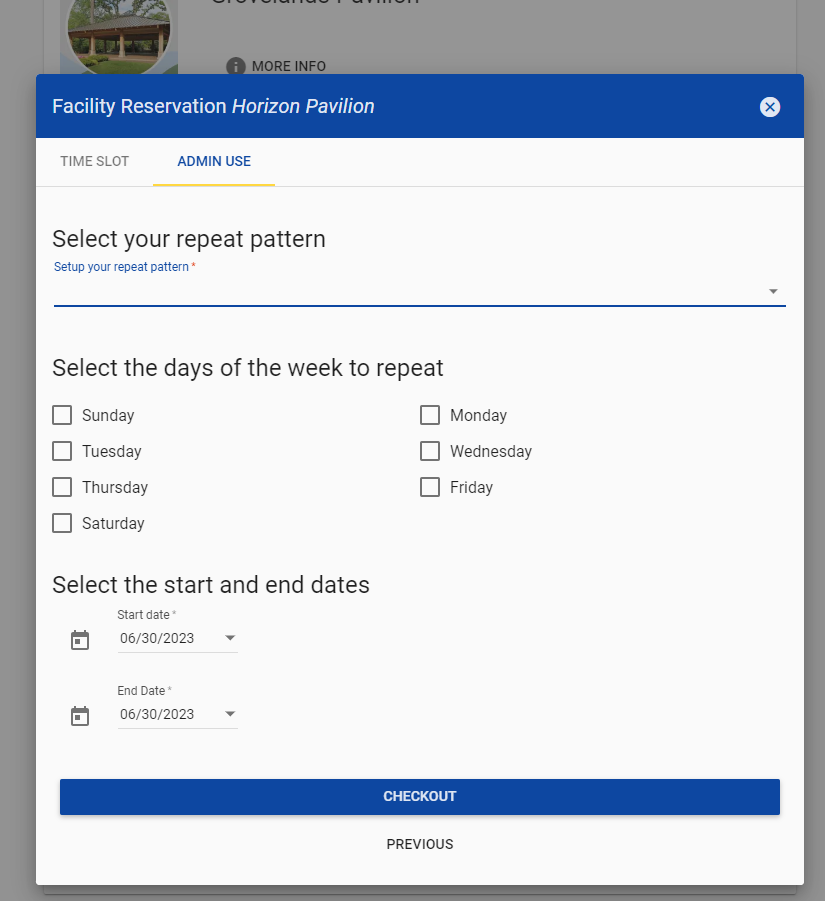
Click checkout. For admins only, another tab appears. This tab allows admins to create repeated events.
To use this form, choose a repeat pattern:
- Weekly
- First Week of the Month
- Second Week of the Month
- Third Week of the Month
- Fourth Week of the Month
- Every 2 Weeks
- Every 3 Weeks
- Every 4 Weeks
- Yearly
- Last Week of the Month
Choose the day or days of the week on which the event will repeat
Choose the start and end dates for the series of events
Click checkout.
After clicking “checkout,” a new page loads. If not already logged in as admin, do so. The new options are to search or create contacts.
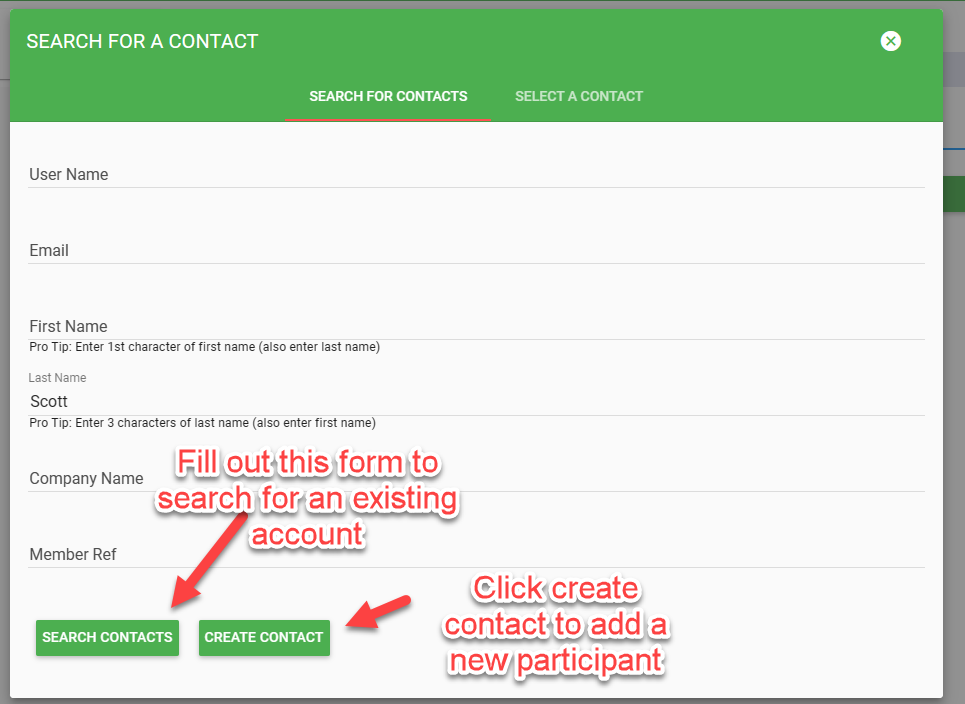
Searching allows admins to find an existing contact, including the House Account. House Account is used for internal reservations with no associated contact.
Fill out the modal box with minimal info to search for the desired contact. Then, select the contact from the list.

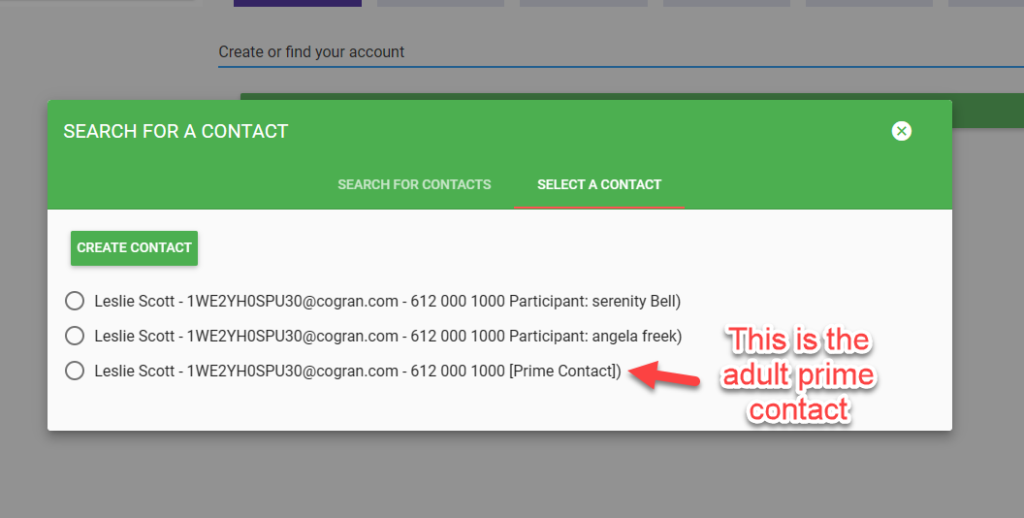
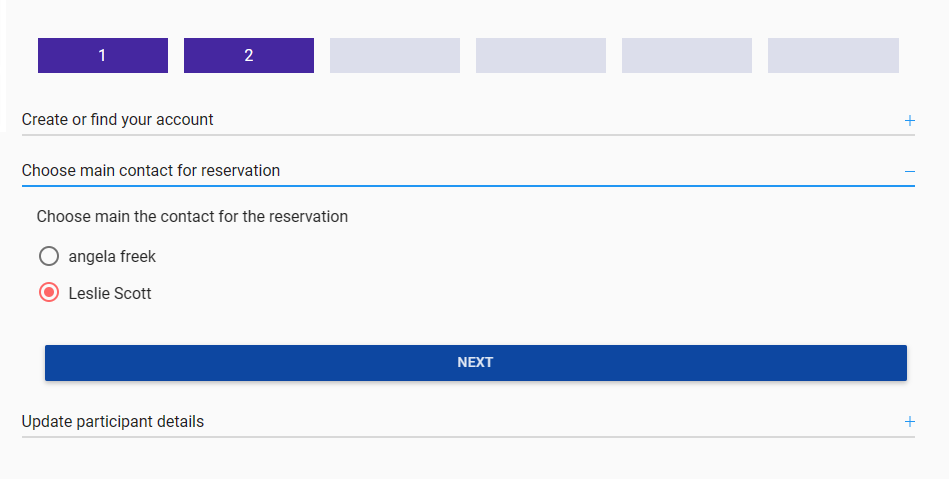
Once a participant has been selected, press “next.”
Enter any necessary participant details: for example, enter the zip code for residency, or select an organization type for other relevant special pricing.
When the form is complete, click “next.”

Fill out the form to select a facility. If a facility already appears, that is because it was previously selected using the calendar. Select it to finish filling out details!
Red fields are mandatory, and other fields are optional. Once the fields are filled out, please select save.
If there are any questions to answer, please do so carefully. These questions may have prices attached to them for your users. The prices and answers will automatically post at checkout, on the next page.
Click “next.”
Review the reservation. This will show all the options selected, as well as the prices associated with them.
Double check the reservation details!
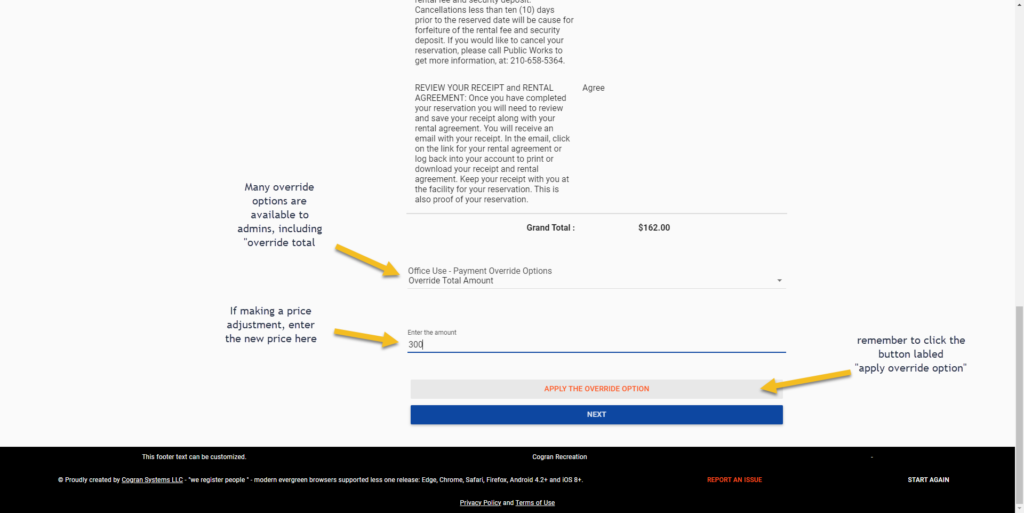
In addition, admin options are now available:
- Clear Admin Overrides
- No Payment
- Override Total Amount
- Hourly Override
- Set Deposit Balance Two Weeks Before
- Set Deposit 50% of Order
- Total due 2 Weeks Before
- Set Full Payment Due
If updating the amount, enter the amount on in the correct field
Click “Apply the Override Option.”
The price will adjust.
Then, click next.
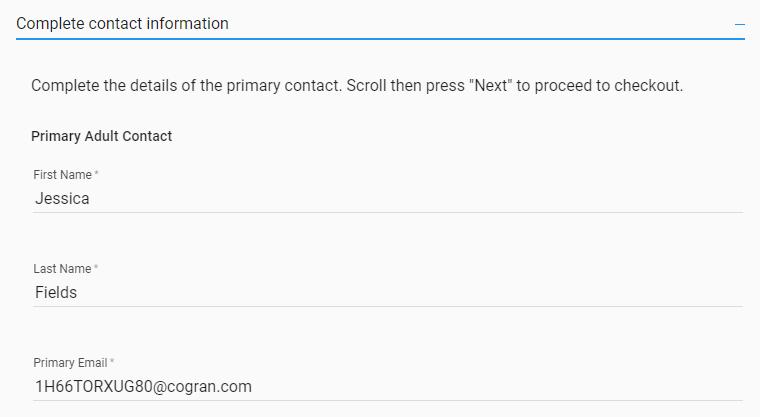
Complete Contact Information
In some cases, the contact’s full information will be complete. If there is information that must be completed, fill this in or verify the info with the registrant.
Click “Next”
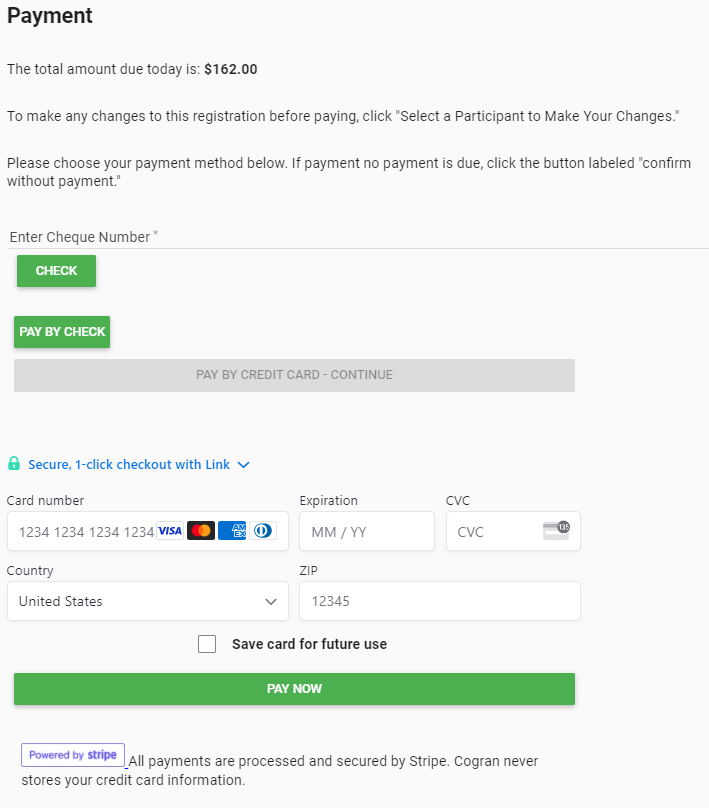
Payment
The payment panel loads. Payment Options appear. Depending on the site, these options may be:
- Check (for in-person checks): Enter the check number. Then click “Pay by Check”
- Pay by Credit Card over the phone/from a form: Click the button labeled “Pay by Credit Card-Continue.” This opens the online credit card payment module
- Cash: Use this to record payments made with “cash.”
- The option for a card swipe is available. Card swipe/Apple Pay requires Stripe Terminal
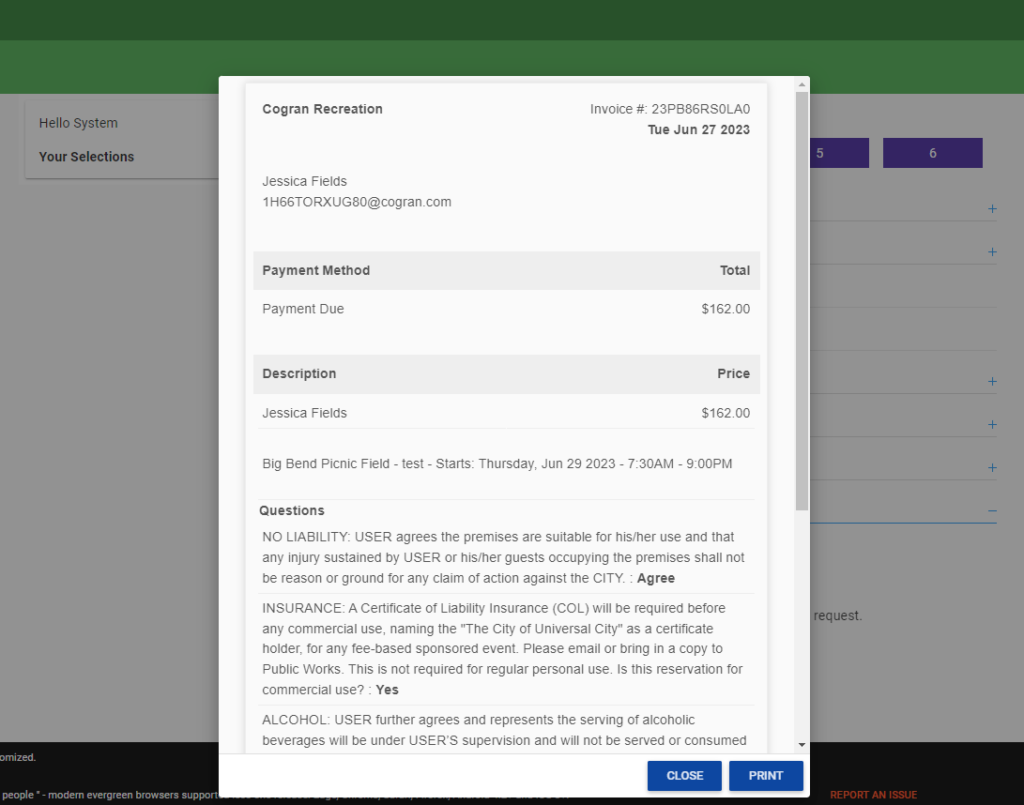
When payment is complete, a receipt pops up. Click “print” to print out a copy. Click “close” to close the modal.
The transaction is complete!