Facility Management Using the Facility Timeline
Administrators use the Front Page Facility Timeline for most day-to-day functions in facility management. This article will provide an overview. The Facility Timeline is where admins will manage and view reservations.
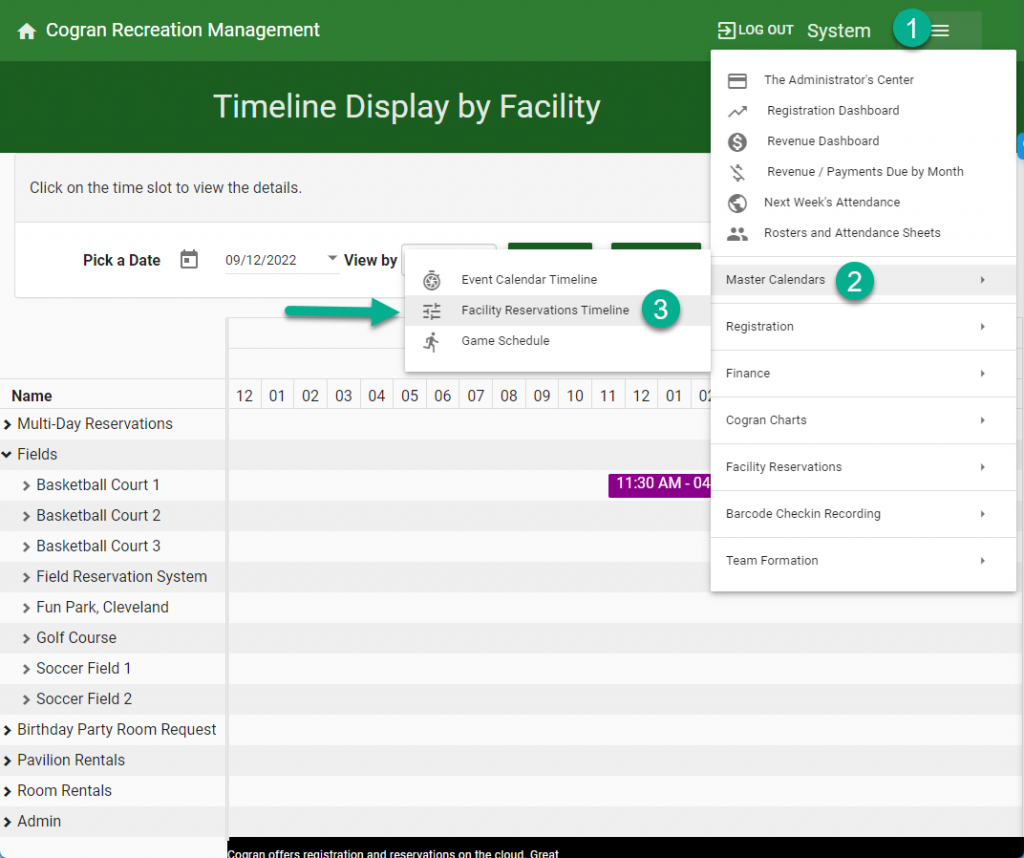
How to Find the Facility Timeline
- Visit the Front Page
- Log in as admin
- Click on the menu in the upper right hand corner of the Front Page
- Scroll to Master Calendars
- Select Facility Reservation Timeline
How to Use the Facility Timeline
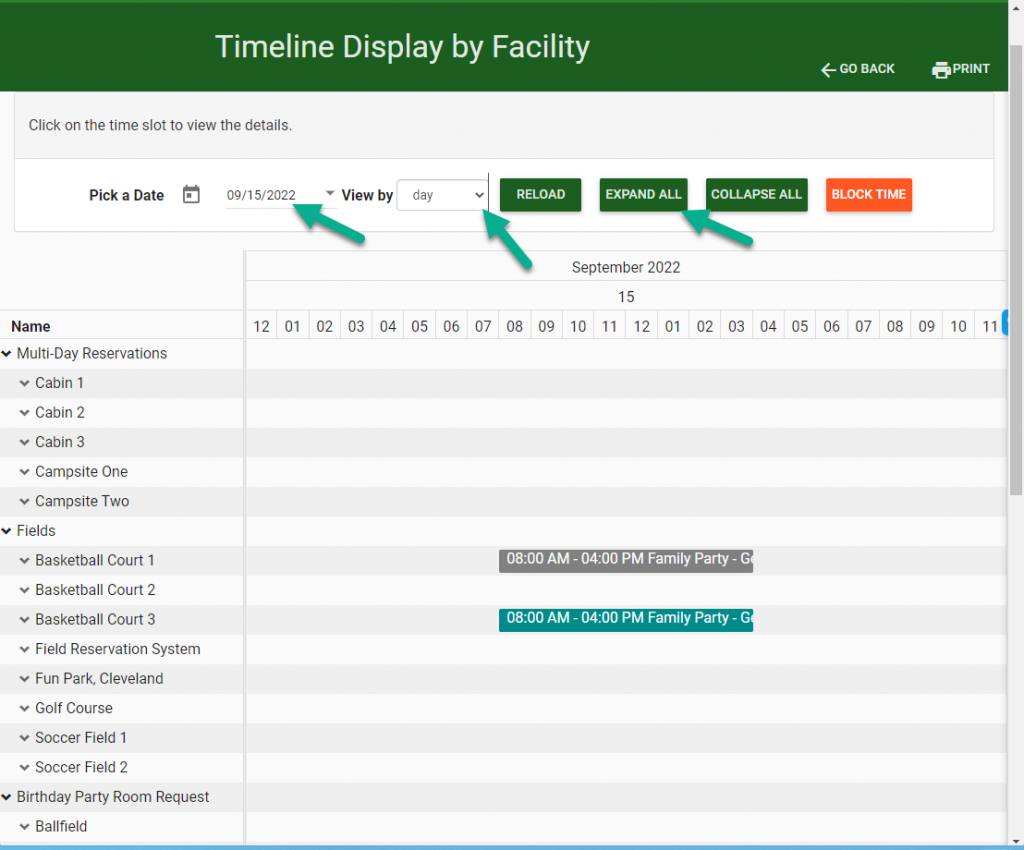
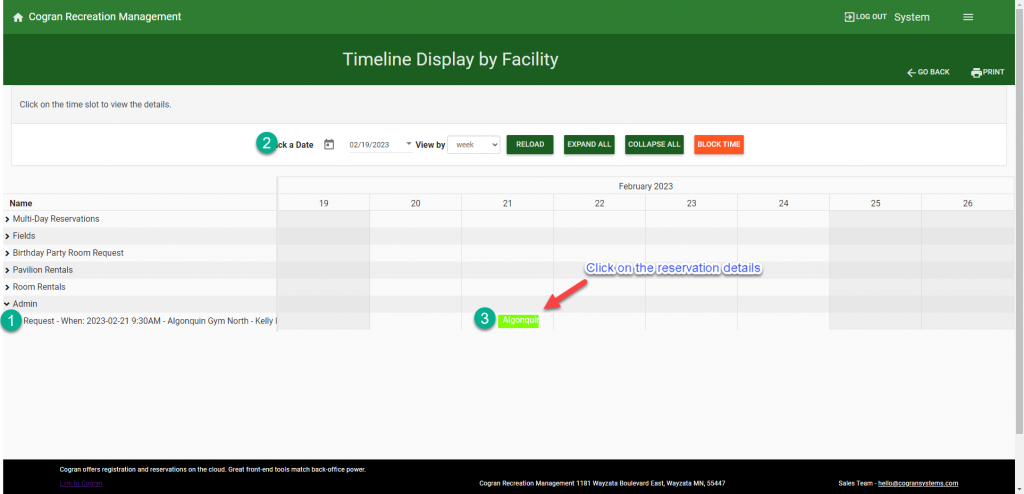
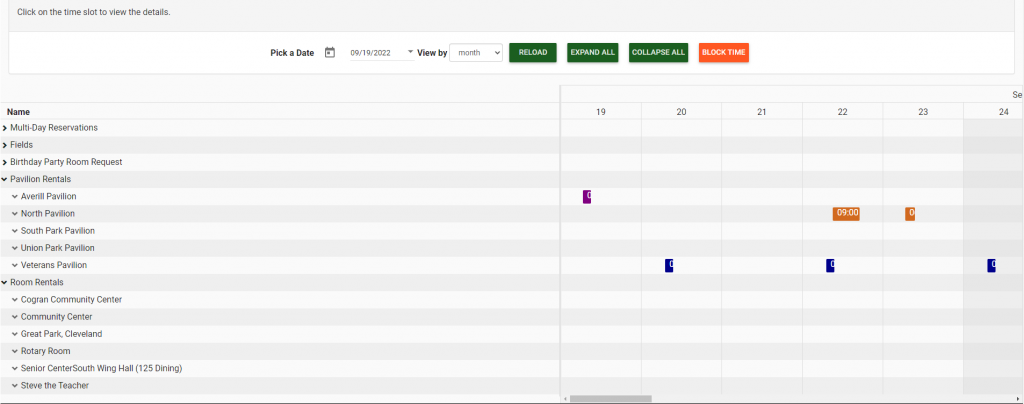
- By default, the calendar shows today’s date. This can be changed by editing the date.
- By default, the calendar displays by day. To view more reservations, click “view by month” or “view by week”
- At the left of the grid, a list of all facility cards appears.
- To view all reservations, click “expand all.” Otherwise, toggle the carat next to the card name to open a selection of cards.
- To view reservation details, select a colored time slot listing.
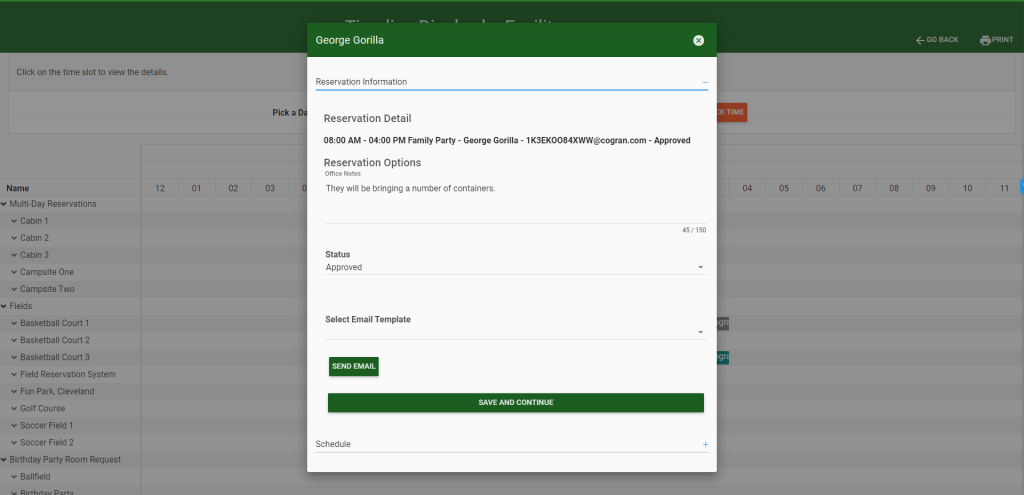
A modal appears. This modal will allow approving, canceling, updating, and more.
- Visit the Front Page
- Log in as admin
- Click on the menu in the upper right hand corner of the Front Page
- Scroll to Master Calendars
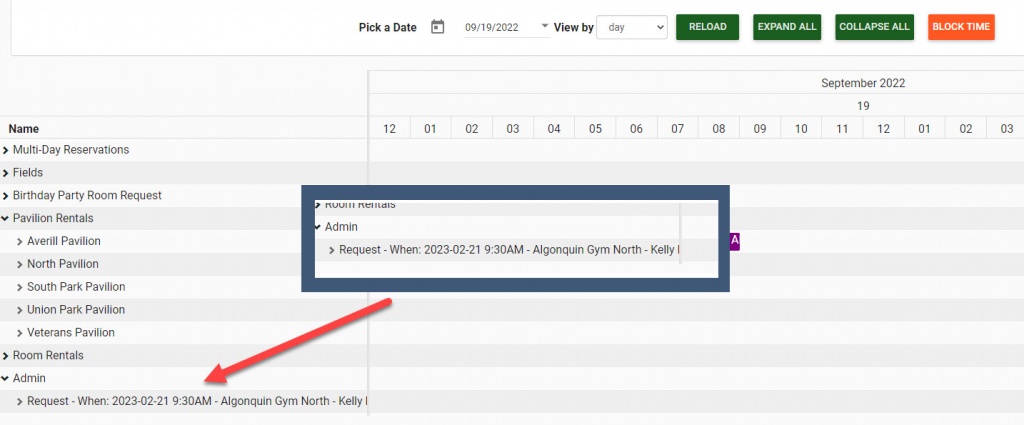
How to View and Update Pending Reservations in the Facility Timeline
Facility reservations may be automatically approved, or they may be set up for admins to review and approve. At this time, the facility reservation questions may be updated, emails be sent, costs changed and/or updated, and approval status be updated.
- On the timeline left-hand menu, scroll to the menu item called “Admin.” This should be at the bottom of the menu.
- Note the “request” listed.
- View the date.
- Choose that date at the top of the grid: choose week, day, or month view.
- When the date is selected, the reservation will be visible on the grid.
- Click on the facility grid item.
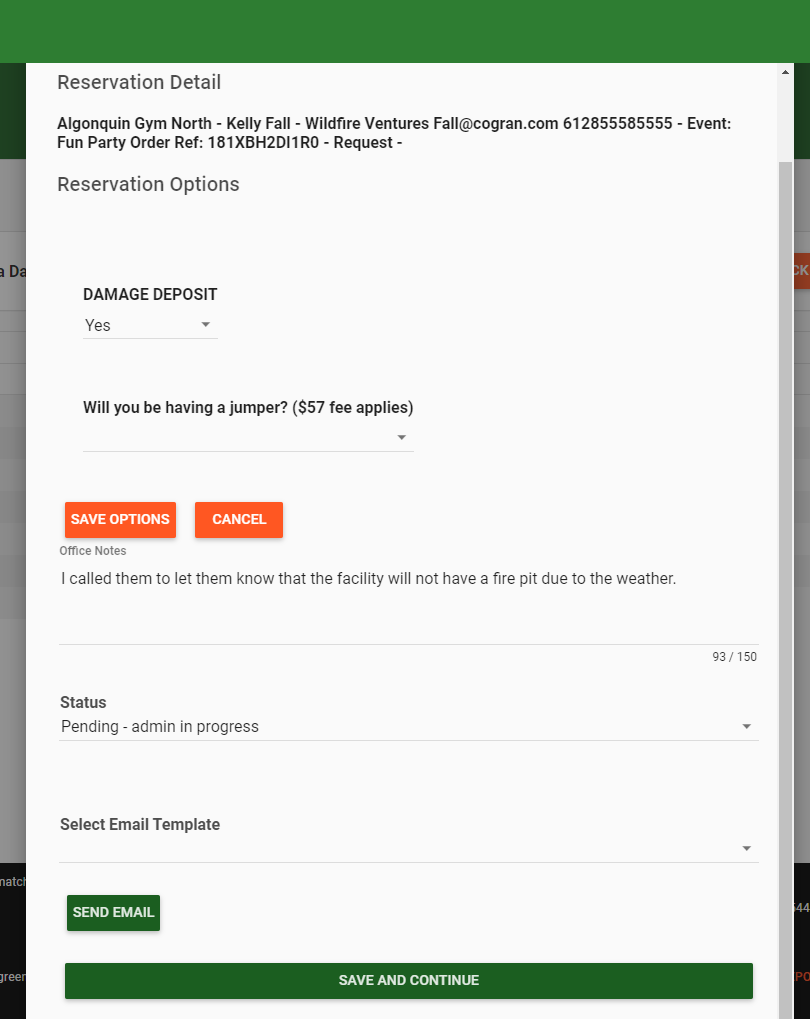
- A modal will open.
- All updates will now take place in the modal. Tip: remember to click the titles to progress. They do not automatically open, as not all reservations will require each step.
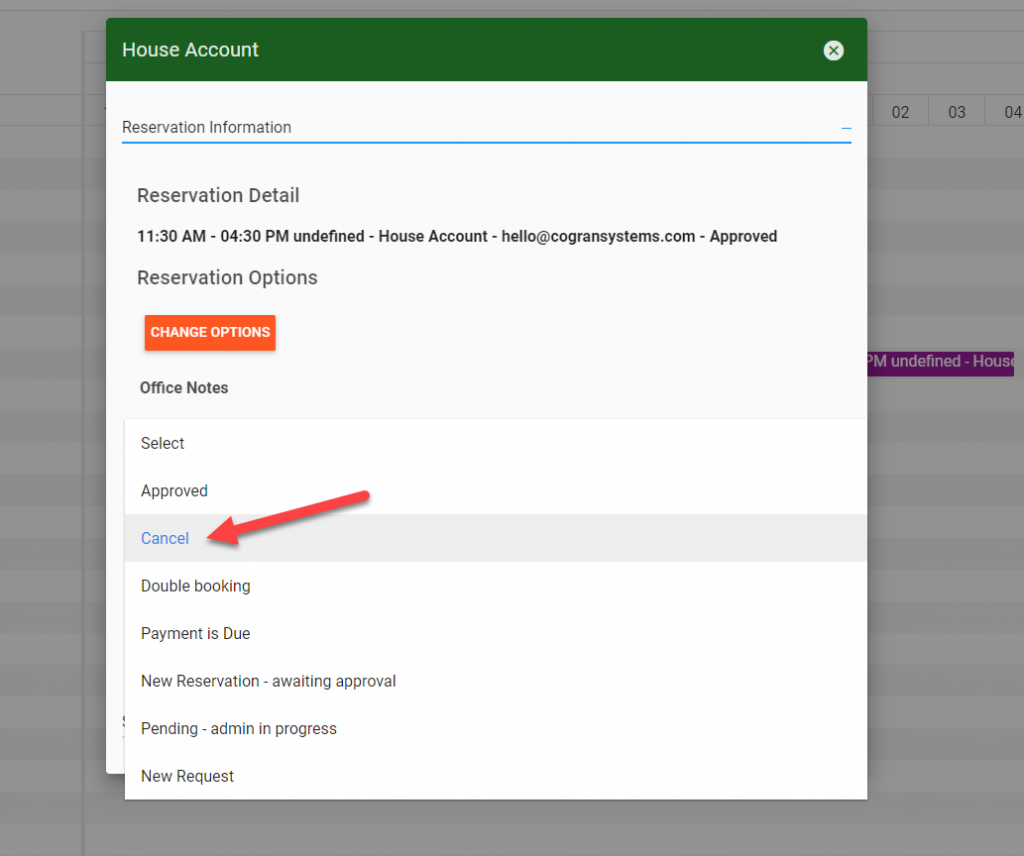
Reservation Detail
- Change Options:
- Clicking on this will update the questions that the customer answered during reservations.
- Notes:
- Enter notes about the reservation, if any. For example, log calls and issues.
- This is a great place to add information about the status of the facility post-reservation.
- Status:
- Approved
- Cancel
- Double-booking
- Payment is Due
- New Reservation–awaiting approval–this will be automatically applied when a facility is set up for admin approvals
- Pending
- New Request–this will be automatically applied when a facility is set up as an “Activity Request”
- Select Email Template:
- Choose an email template to send to inform customers of status updates. Fields will auto-populate with customer info.
- Add more templates by using “Facility” as the first word in the template name (backoffice).
- Save and continue.
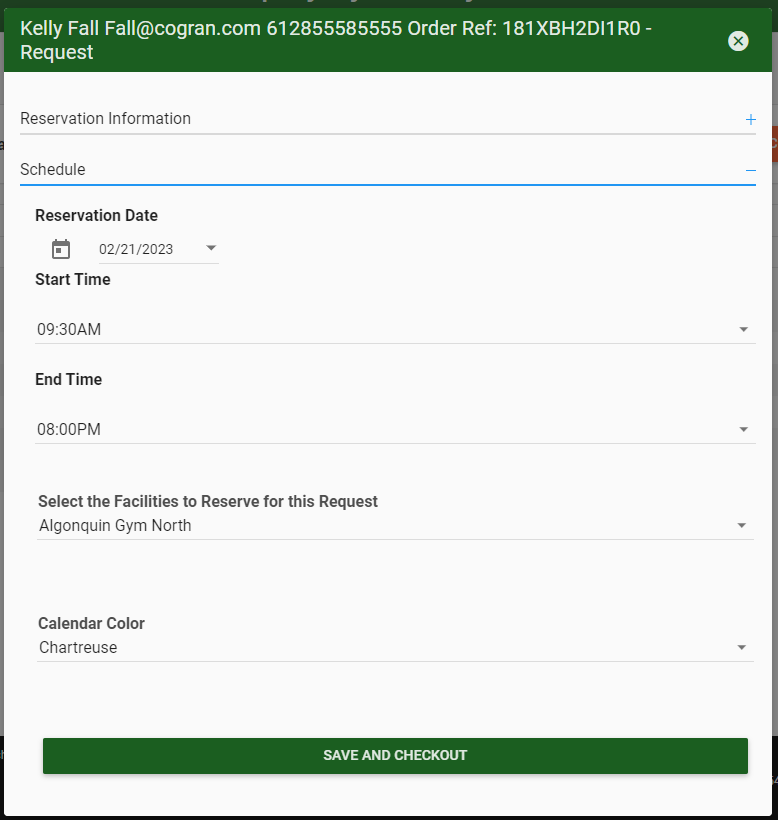
Schedule
In this section, the details of the reservation can be updated, as wll as the start and end time.
- Change date, start time, and end time.
- Select the Facilities to Reserve: Reservation requests MUST be associated to an available facility. Use the facility grid to see if there are any spots available. In other cases, use this dropdown to reassingn this reservation to one or more facilities.
- Calendar Color: Update the calendar color if required.
- Save
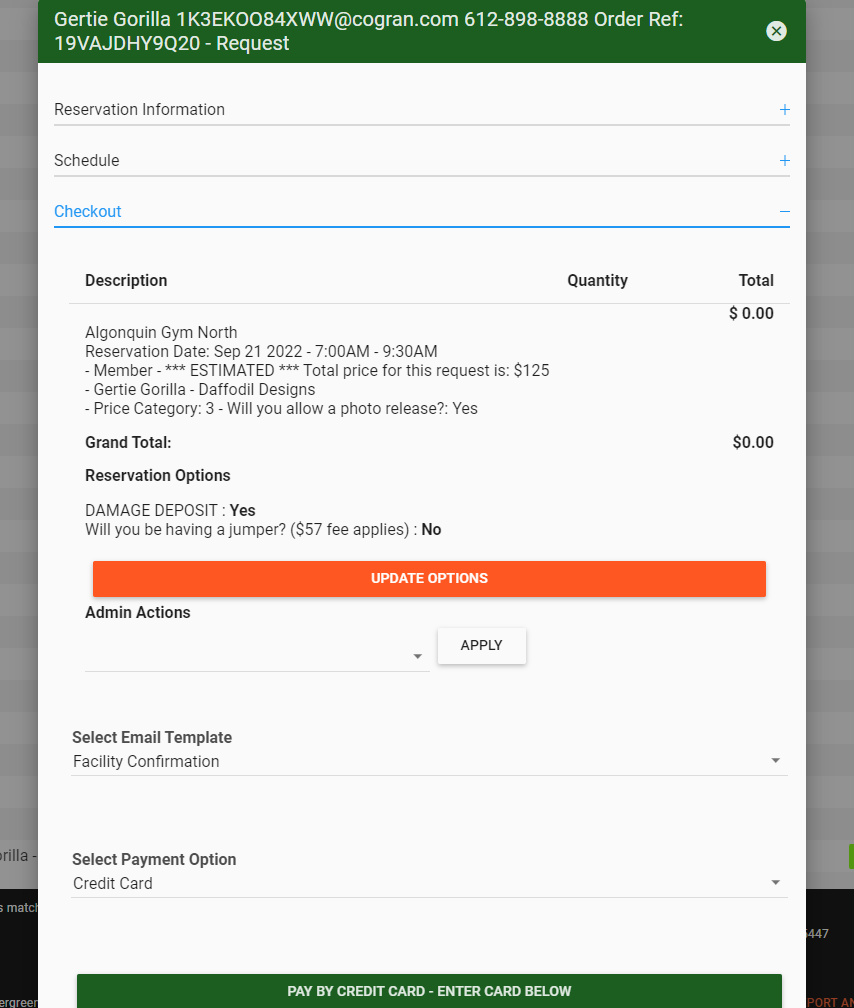
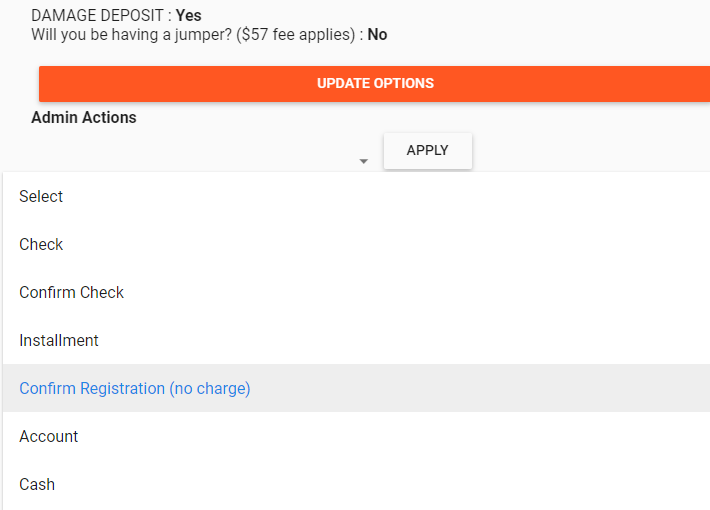
Checkout.
- Description: all of the details of the reservation will display here, including final prices. To make changes, click “update options.”
- Admin Actions: Many admin actions are available.
- Clear Admin Overrides: use this to clear previous admin actions
- No Payment: use this to process a transaction with no payment
- Override Total Amount: use this to update a price completely. Upon selection, enter the price.
- Hourly Override: use this to update an hourly rate. Upon selection, enter the new hourly rate.
- Set Deposit Balance 2 weeks before: use this to set a deposit due two weeks before a reservation
- Set Deposit 50% of Order Total due 2 Weeks Before: use to set a deposit of 50% of the total amount due.
- Click “Apply.”
- Select a Facility email to update the customer.
- Select a Payment Option:
- Check–use when a check is expected
- Confirm Check–use when check is received
- Installment
- Confirm Registration (no charge!)
- Account–customer will pay from their account
- Cash–use when cash is paid
- Credit Card–allows you to enter credit card details
- Due–customer will pay from their account
- Card Reader–use a card reader
To save changes, click “confirm.” There will be an option to “print receipt” if needed.
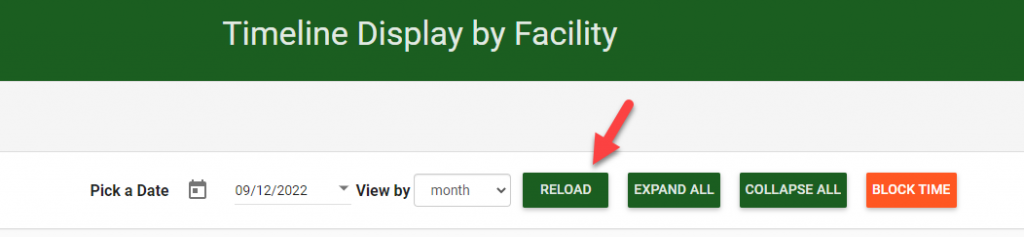
Navigate to the top of the chart and click the buttom “reload.” This updates the data of the grid.
The updated event will now appear on the grid on the correct date and time. To make further changes, click the colored block and update using the grid.
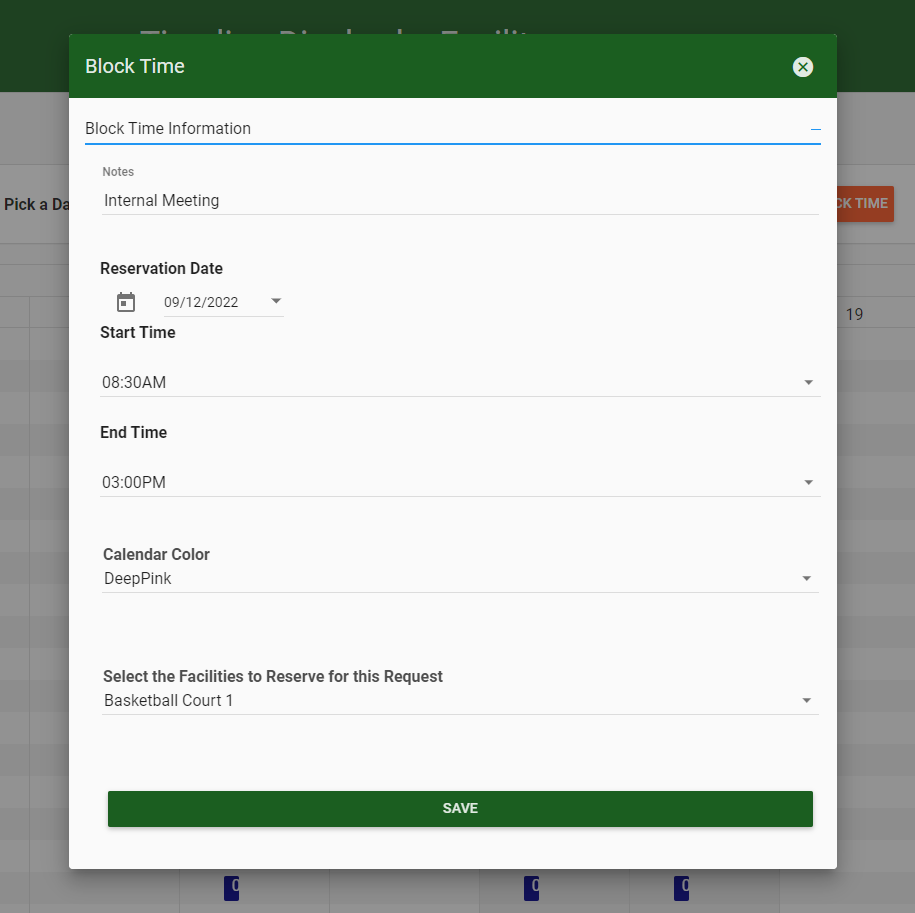
Block Time:
This allows admins to ad-hoc reserve times for internal events or reservations made without using Cogran. (For recurring reservations, it is recommended to use the Cogran Reservation Management system, which allows recurring reservations to be set up by admins).
- At the top of the timeline, click on “Block Time”
- A modal appears. Fill out the Form:
- Notes
- Reservation Date
- Start Time
- End Time
- Calendar Color
- Select the Facilities to Reserve for this Request
- Save
- Once this form has been filled out and saved, click the refresh button at the top of the timeline. (Be sure to view the correct dates.)
Cancel a Reservation
- To remove or update, click on the listing on the timeline
- The modal opens
- Click “Change Options” to update general information
- Under “Status,” select the option called “Cancel.”
- Save
- Refresh to clear from the calendar
Updated 9.12.22